Introduction
After installing the Connect Tech Board Support Package, additional Jetpack SDK Components are available to be used on your Jetson module. For more information on the NVIDIA Jetpack SDK Components, please click here. The following guide shows instructions on how to install the Jetpack SDK Components on top of the Connect Tech Board Support Package so that our BSP is not overwritten. Please make sure you have fulfilled all of the prerequisites before following the installation steps to add the Jetpack SDK Components.
Prerequisites
- Initial setup for the Connect Tech Board Support Package on the Jetson module must be completed. Instructions on flashing our BSP can be found here.
- Jetson module must be turned on and connected to the internet as the packages are installed over ssh.
- Jetson module must not have auto updated packages since the original flash. There is a known issue if you update the nvidia docker package (usually via auto update), the components will fail to flash.
Installation Steps
1. Open Nvidia SDK Manager. For first time use, you must log in to your Nvidia Developer account.
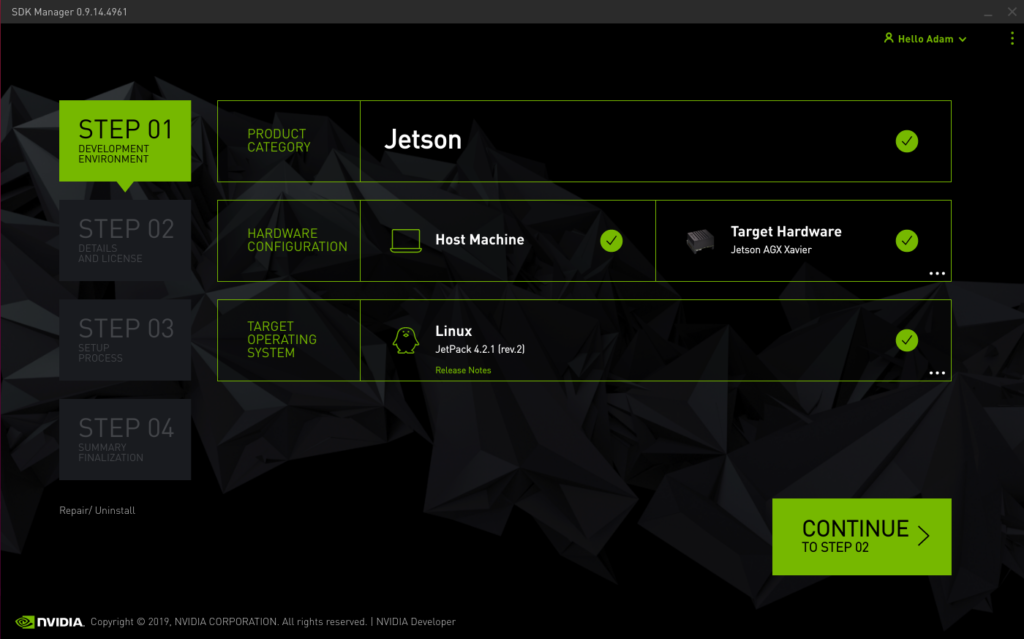
2. Choose your desired hardware and target operating system then continue to STEP 02. For this example, we will choose the AGX Xavier as our target hardware and Jetpack 4.2.1 as our target operating system.
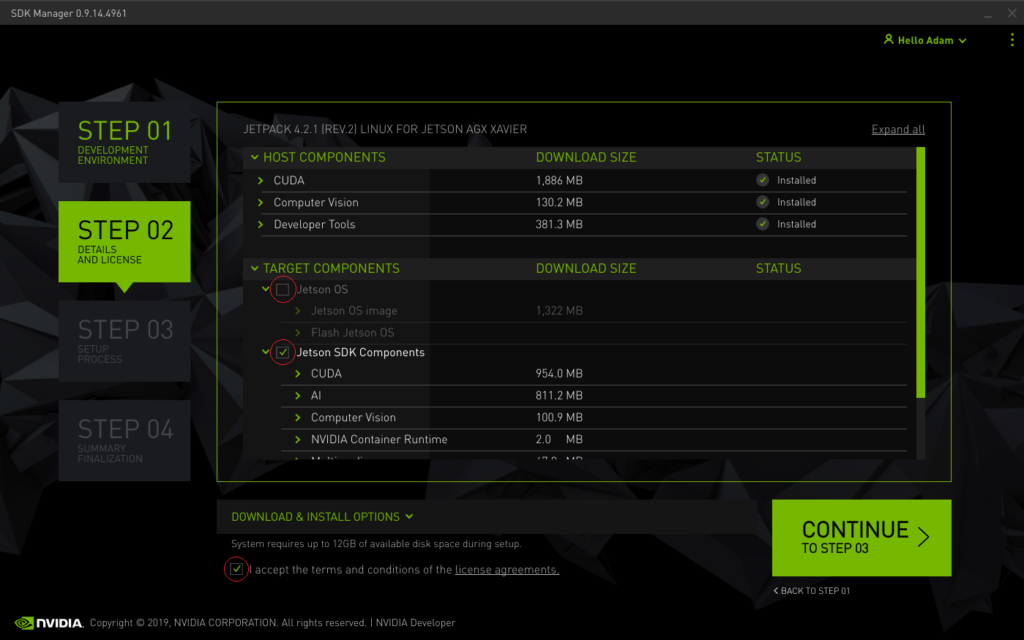
3. Under Target Components, uncheck Jetson OS and check Jetson SDK Components. Afterwards, accept the terms and continue to STEP 03.
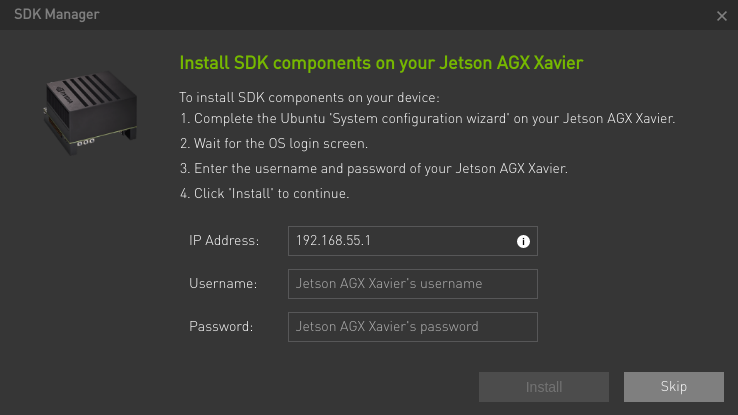
4. Once the SDK Components have downloaded, a prompt will show up. Fill in the IP address and login of your Jetson module and hit Install.
*Please note that the default 192.168.55.1 is the using the Ethernet bridge over USB. The CTI carriers do NOT have this feature. You must log into your system and check the IP there.
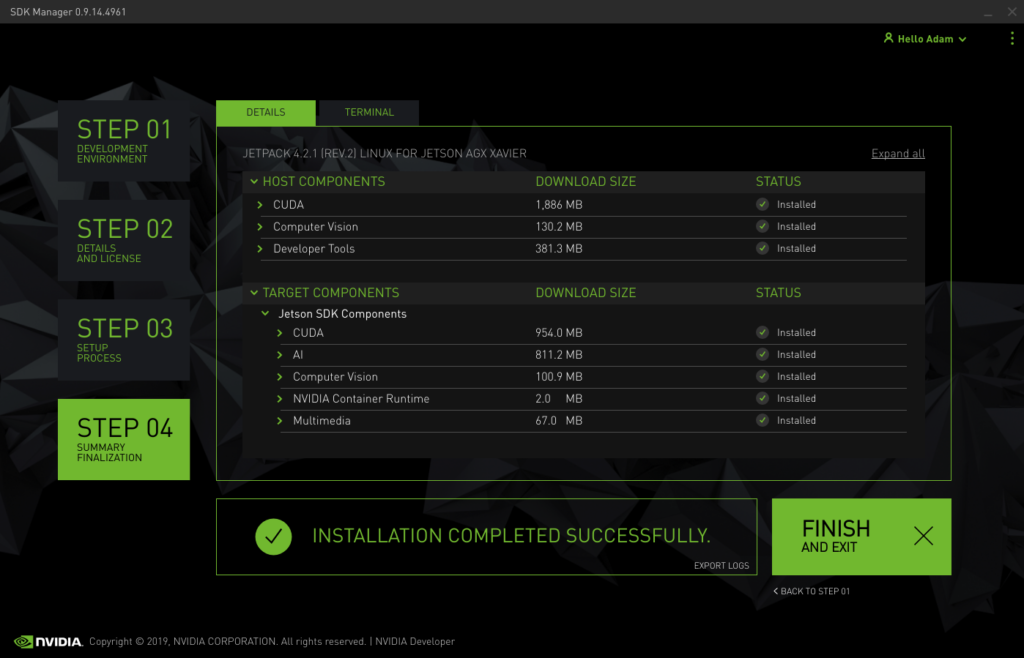
5. Once the download and install from STEP 03 is finished, review the summary finalization in STEP 04 and click ‘FINISH AND EXIT’.
- Connect the TX2/TX2i/TX1 system to the same network as your host machine and determine its IP address.
- Run the Jetpack automatic installer.
./JetPack-L4T-X.X-linux-x64.run - Select the desired module TX2/TX2i or TX1.
- Change all entries other than “Install on Target” from “install” to “no action” in the GUI. Jetpack will download any missing packages that are required. This may take some time.
- Hit continue then you will be prompted to read and accept various license terms.
- Enter the IP address of your TX2/TX2i/TX1 system, as well as the username and password.
- Once the download and install have finished, your module will have the Jetson SDK components and leave the CTI L4T BSP files installed.
Updated September 27, 2021