Title: Installing Embedded Windows Operating Systems On the Xtreme/CPU
Keywords: Windows Embedded Standard 7, Windows XP Embedded, Windows Embedded CE, Qseven, Connect Tech, Xtreme/CPU, QCG
Date: October 28, 2010
KDB: KDB-325
Revision: 0.00
Author: RAC
Distribution: External
Installation
With windows embedded standard 7, images can be installed directly from the installation disk using the Image Builder Wizard (IBW), or from an answer file created using the Image Configuration Editor (ICE). The installation example below has been performed with the QMG001 Congatec Qseven module (Congatec Part number 015001).
Installation using the IBW
With the Image Builder Wizard your Windows Embedded Standard 7 image is created interactively by choosing the various options throughout the installation. There are several ways to boot the IBW installer, in this example the IBW disk was booted on the Xtreme/CPU using a USB DVD drive. You can also use a USB flash drive to boot the IBW, in order to do so it will have to be made bootable using the steps outlined at the end of this kdb.
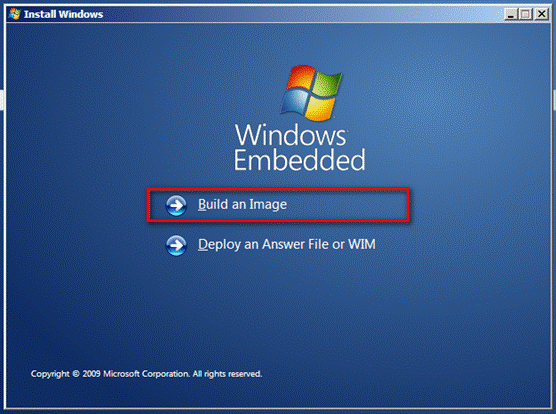
– Once the IBW is booted, it will prompt you to build an image or deploy an answer file or WIM, choose Build an Image.
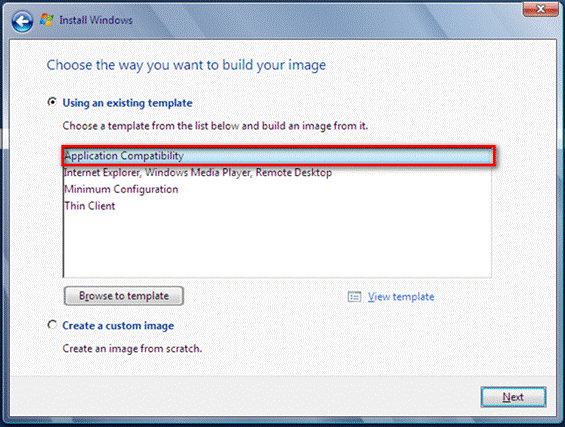
– You will then be prompted to choose to start from a template or create a custom image from scratch. For this example I have selected Application Compatibility as the image template.
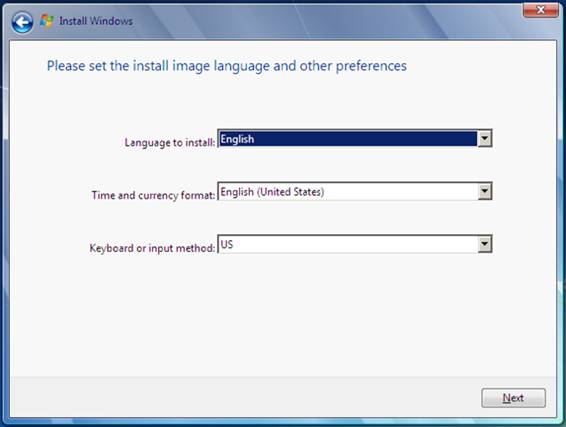
– The next set of options are the language and keyboard settings. For this example I have kept the default settings.
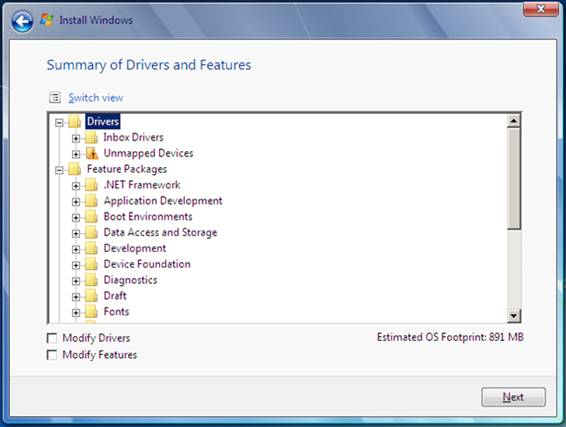
– Once these selections have been made, a summary page that shows all that will be included in the image will appear. If other drivers and/or features need to be added to the image they can be added here. For this example no additional drivers or features were included.
NOTE:
If hardware has been detected but correct drivers could not be found they will be listed in the “unmapped devices” folder. In this example when using the QMG001 Congatec module there are no unmapped devices.
– Once all the desired features and drivers have been added/removed, select Next. Then choose where you would like to have this image installed. For this example, the image was installed on a SATA hard drive connected to the Xtreme/CPU.
– Once the installation completes, a few final steps will need to be made to complete the installation.
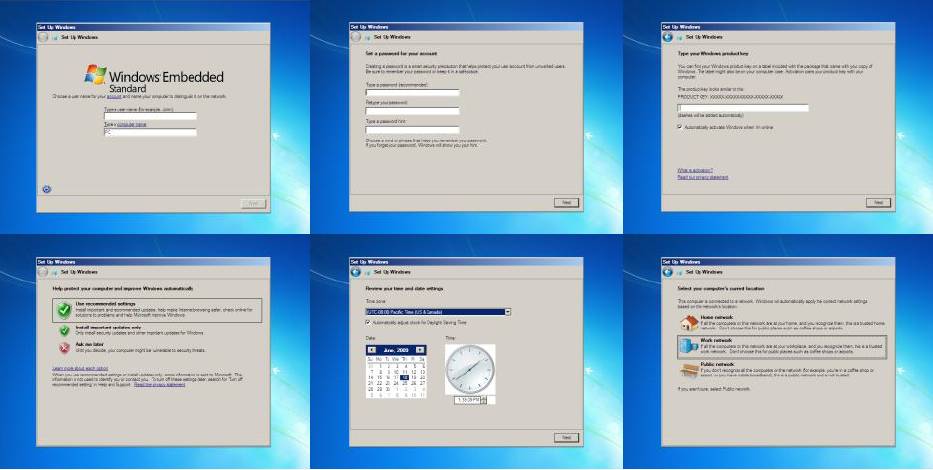
– The image is now successfully installed.
Building an Image from an Image Configuration Editor Answer File.
- At the initial boot screen, choose Install From Answer File
- You can now browse to where you have the answer file stored. For this example the answer file was placed on a bootable USB utility drive. Please see below on how to make the USB drive bootable.
- Choose where to install the image, and the installation should proceed as shown in the steps above.
End of KDB-326